
The lace trick to save your toes
By Adventure Guide Suz
Over the years, you may have heard me talking about boots, or more specifically, a lacing technique I learnt just over seven years ago while hiking sections of the Larapinta Trail.
I've experienced firsthand how much the right boot, and more importantly, the right fit, can make or break a day on the trail.
One of the many conversations we have at trek training is about sore toes, hot spots, blisters, numb feet or boots that just don't feel quite right. Often, the first instinct is to blame the boots themselves.
Sometimes that's true. But surprisingly... sometimes it isn't.
Did you know that changing the way you lace your boots can completely change how they feel on your feet? It's simple, costs nothing and could make your next hike far more comfortable.
It's important for your own comfort, endurance and health to customise your gear, and this includes your boots. Without it, it's a bit like heading out with a brand-new backpack and never adjusting the straps. Your feet swell, they fatigue and sometimes one foot behaves completely differently to the other.
Why change the way your boots are laced?
Changing your lacing helps customise your boots to suit your feet. Different lacing patterns can help:
• stop your heel lifting
• reduce toe bang on descents
• relieve pressure across the top of your foot
• accommodate wider forefeet
• reduce rubbing over bunions or sore joints
• ease pressure on sensitive toes
• improve overall comfort on long hiking days
Sometimes a 60-second lace adjustment can save you hours of discomfort.
Lacing up differently – a game changer!
When my feet were aching and toes relentlessly and painfully hitting my boot tip, another experienced hiker showed me something I'd never paid much attention to before.
The Heel Lock, also known as the Lock Lace technique. I've laced my boots this way ever since.
Like many hikers, I buy my boots about half a size larger than my everyday shoes. That extra room allows my feet to swell during long days and gives my toes space on descents.
However, without the right lacing, your foot can slowly slide forward inside the boot. That's when your toes start repeatedly hitting the toe box. Hello sore toenails, bruised toes and sometimes those lovely black toenails that hikers wear like a badge of honour. Personally, I'd rather keep my toenails.
The Heel Lock secures your heel firmly into the back of the boot, dramatically reducing forward movement while still allowing your toes the room they need.
My Go-To: The Heel Lock / Lace Lock
This is still my go-to and the technique I recommend more than any other.
Instead of finishing with a standard criss-cross, the final eyelets create two locking loops. As you pull the laces, your heel locks securely into the back of the boot.
You'll usually notice the difference within your first few hundred metres.
By reducing movement inside the boot, your foot is far less likely to slide forward on descents, helping prevent bruised toes, black toenails and blisters on your heels. If you only learn one technique from this blog... make it this one.
Lace your boots normally until you reach the second-last set of eyelets.
Thread each lace straight up through the top eyelet on the same side to create a small loop.
Cross each lace over and pass it through the loop on the opposite side.
Pull firmly to lock your heel in place, then tie your boots as normal.
Suz's Tip: Your heel should feel secure without your toes feeling squashed. If your toes feel tight, loosen the laces slightly through the forefoot before locking the heel.
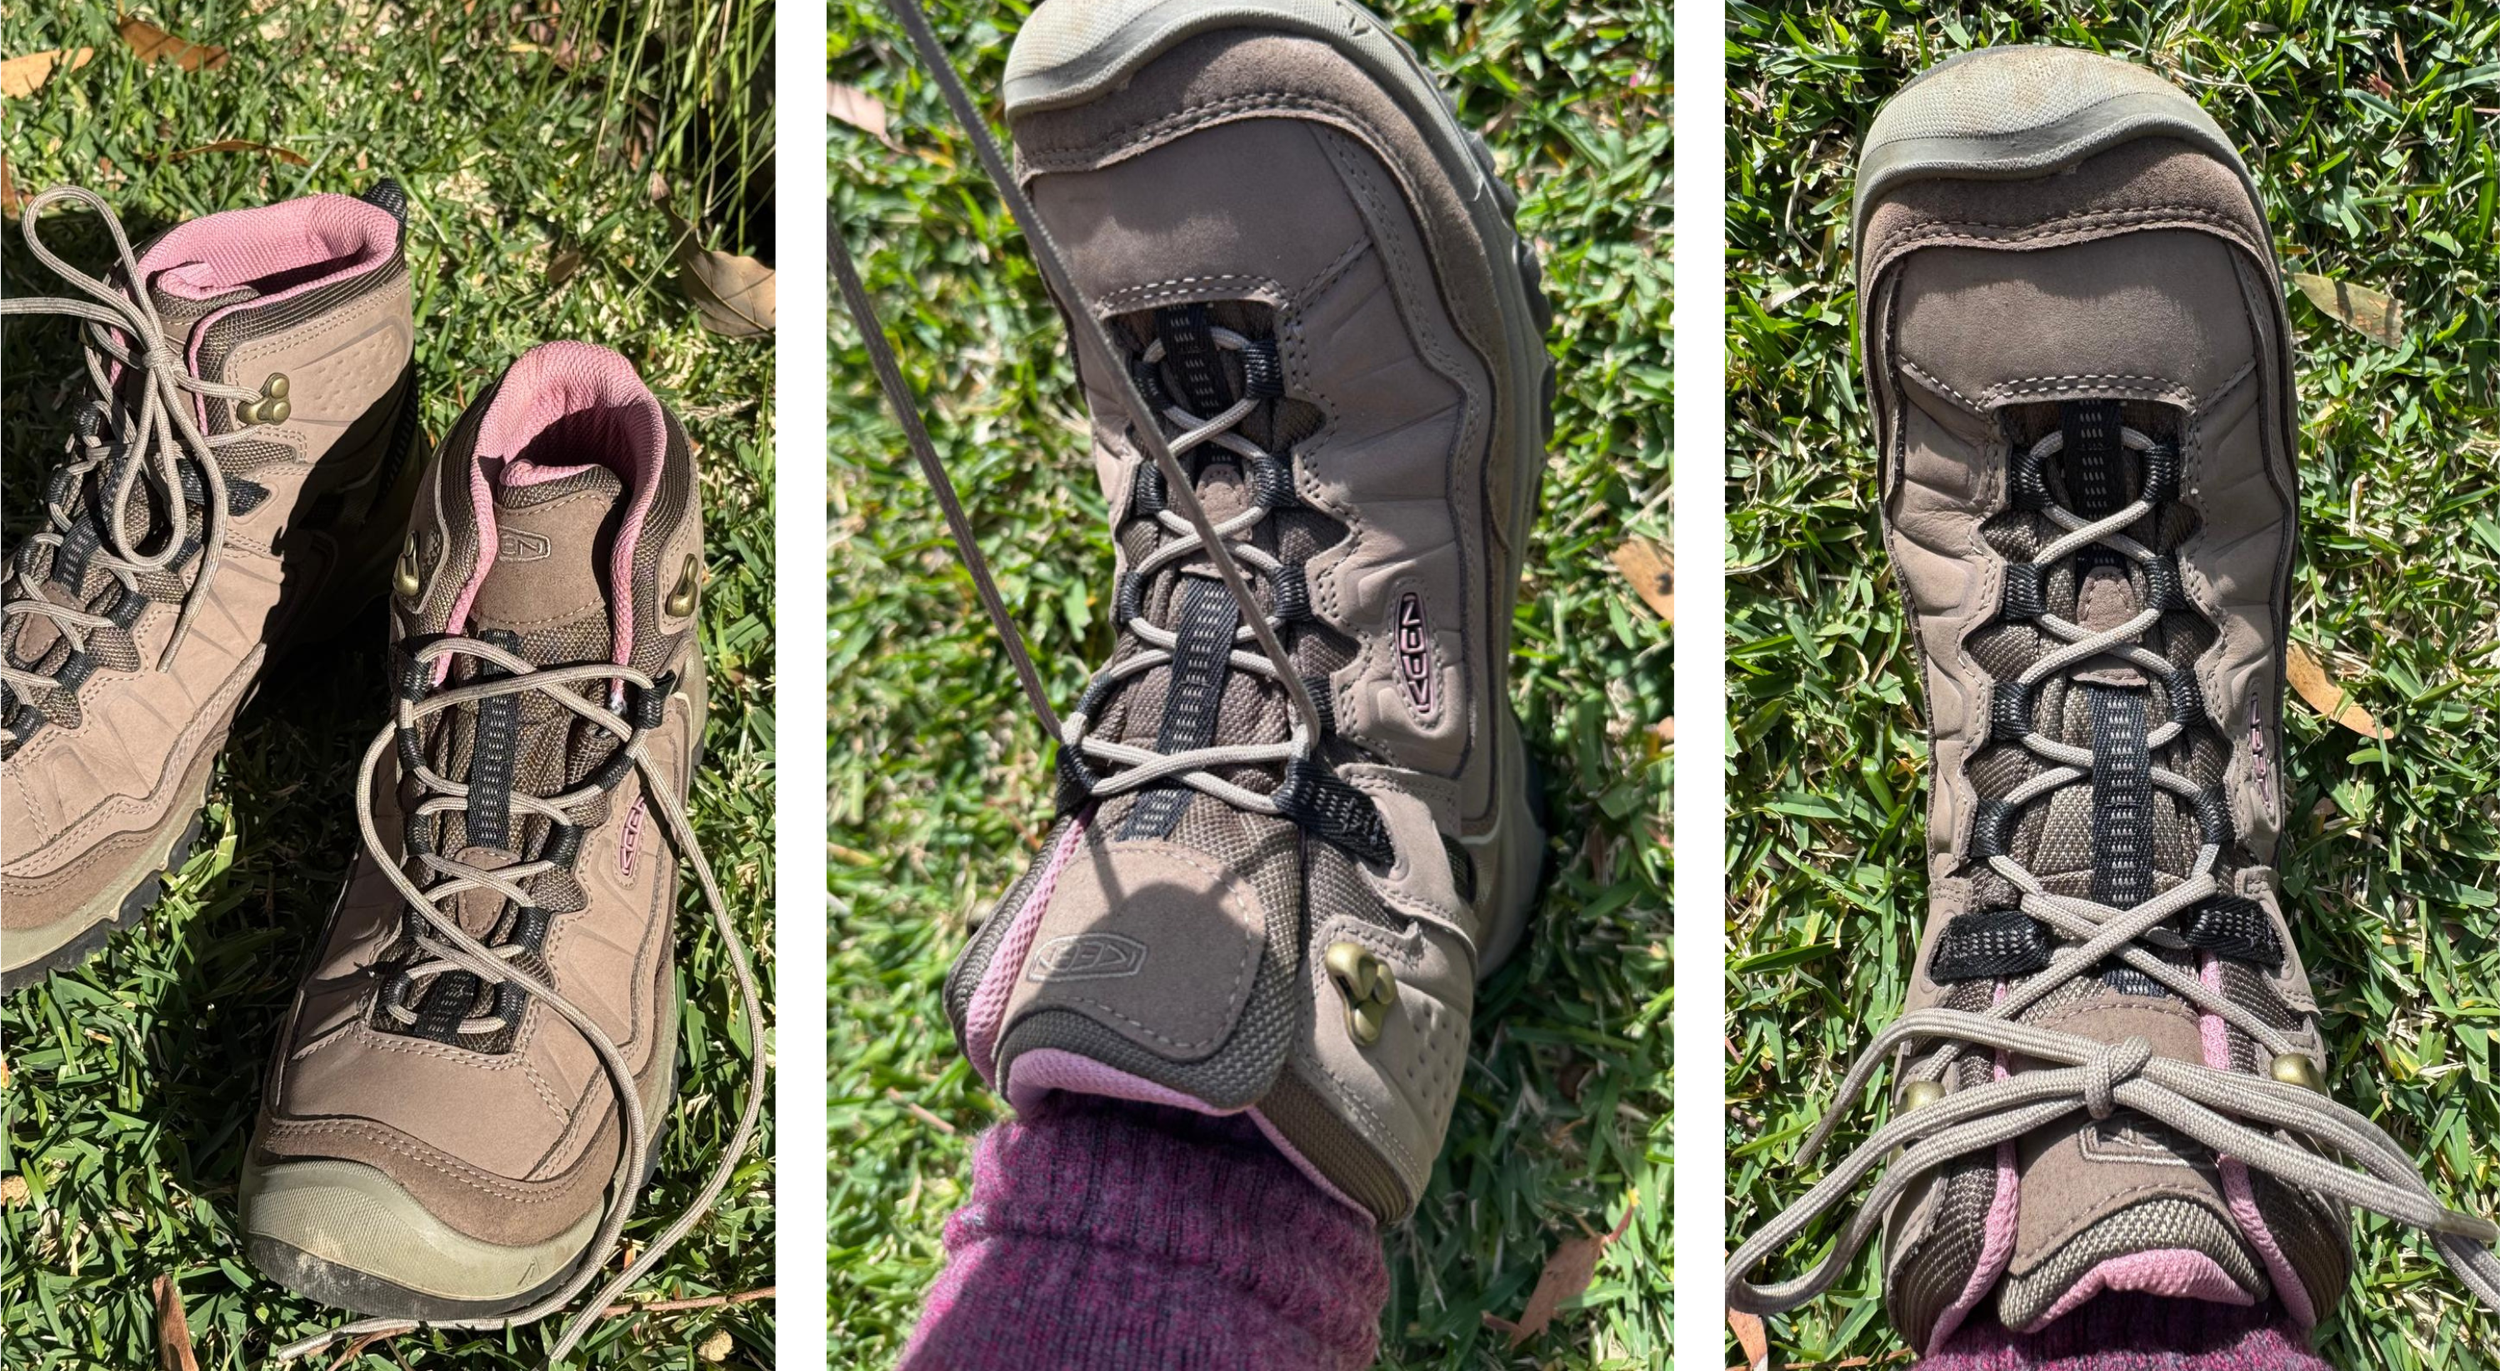
How to: Lace locking
How to Lace a Window Lacing Pattern
If you have a wider forefoot, or you've ever felt pressure across the top of your foot, particularly as your feet swell during a hike, Window Lacing is another simple technique worth trying.
Lace your boots normally until you reach the area where you feel pressure or discomfort on the top of your foot.
Instead of crossing the laces, thread each lace straight up to the next eyelet on the same side.
Continue lacing normally above the pressure point, crossing the laces again until you reach the top.
Tie your boots as usual, adjusting the tension until your foot feels secure but pressure-free.
Suz's Tip: The "window" should sit directly over the sore spot. If the pressure is higher or lower on your foot, simply move the window up or down to suit where you need the relief.
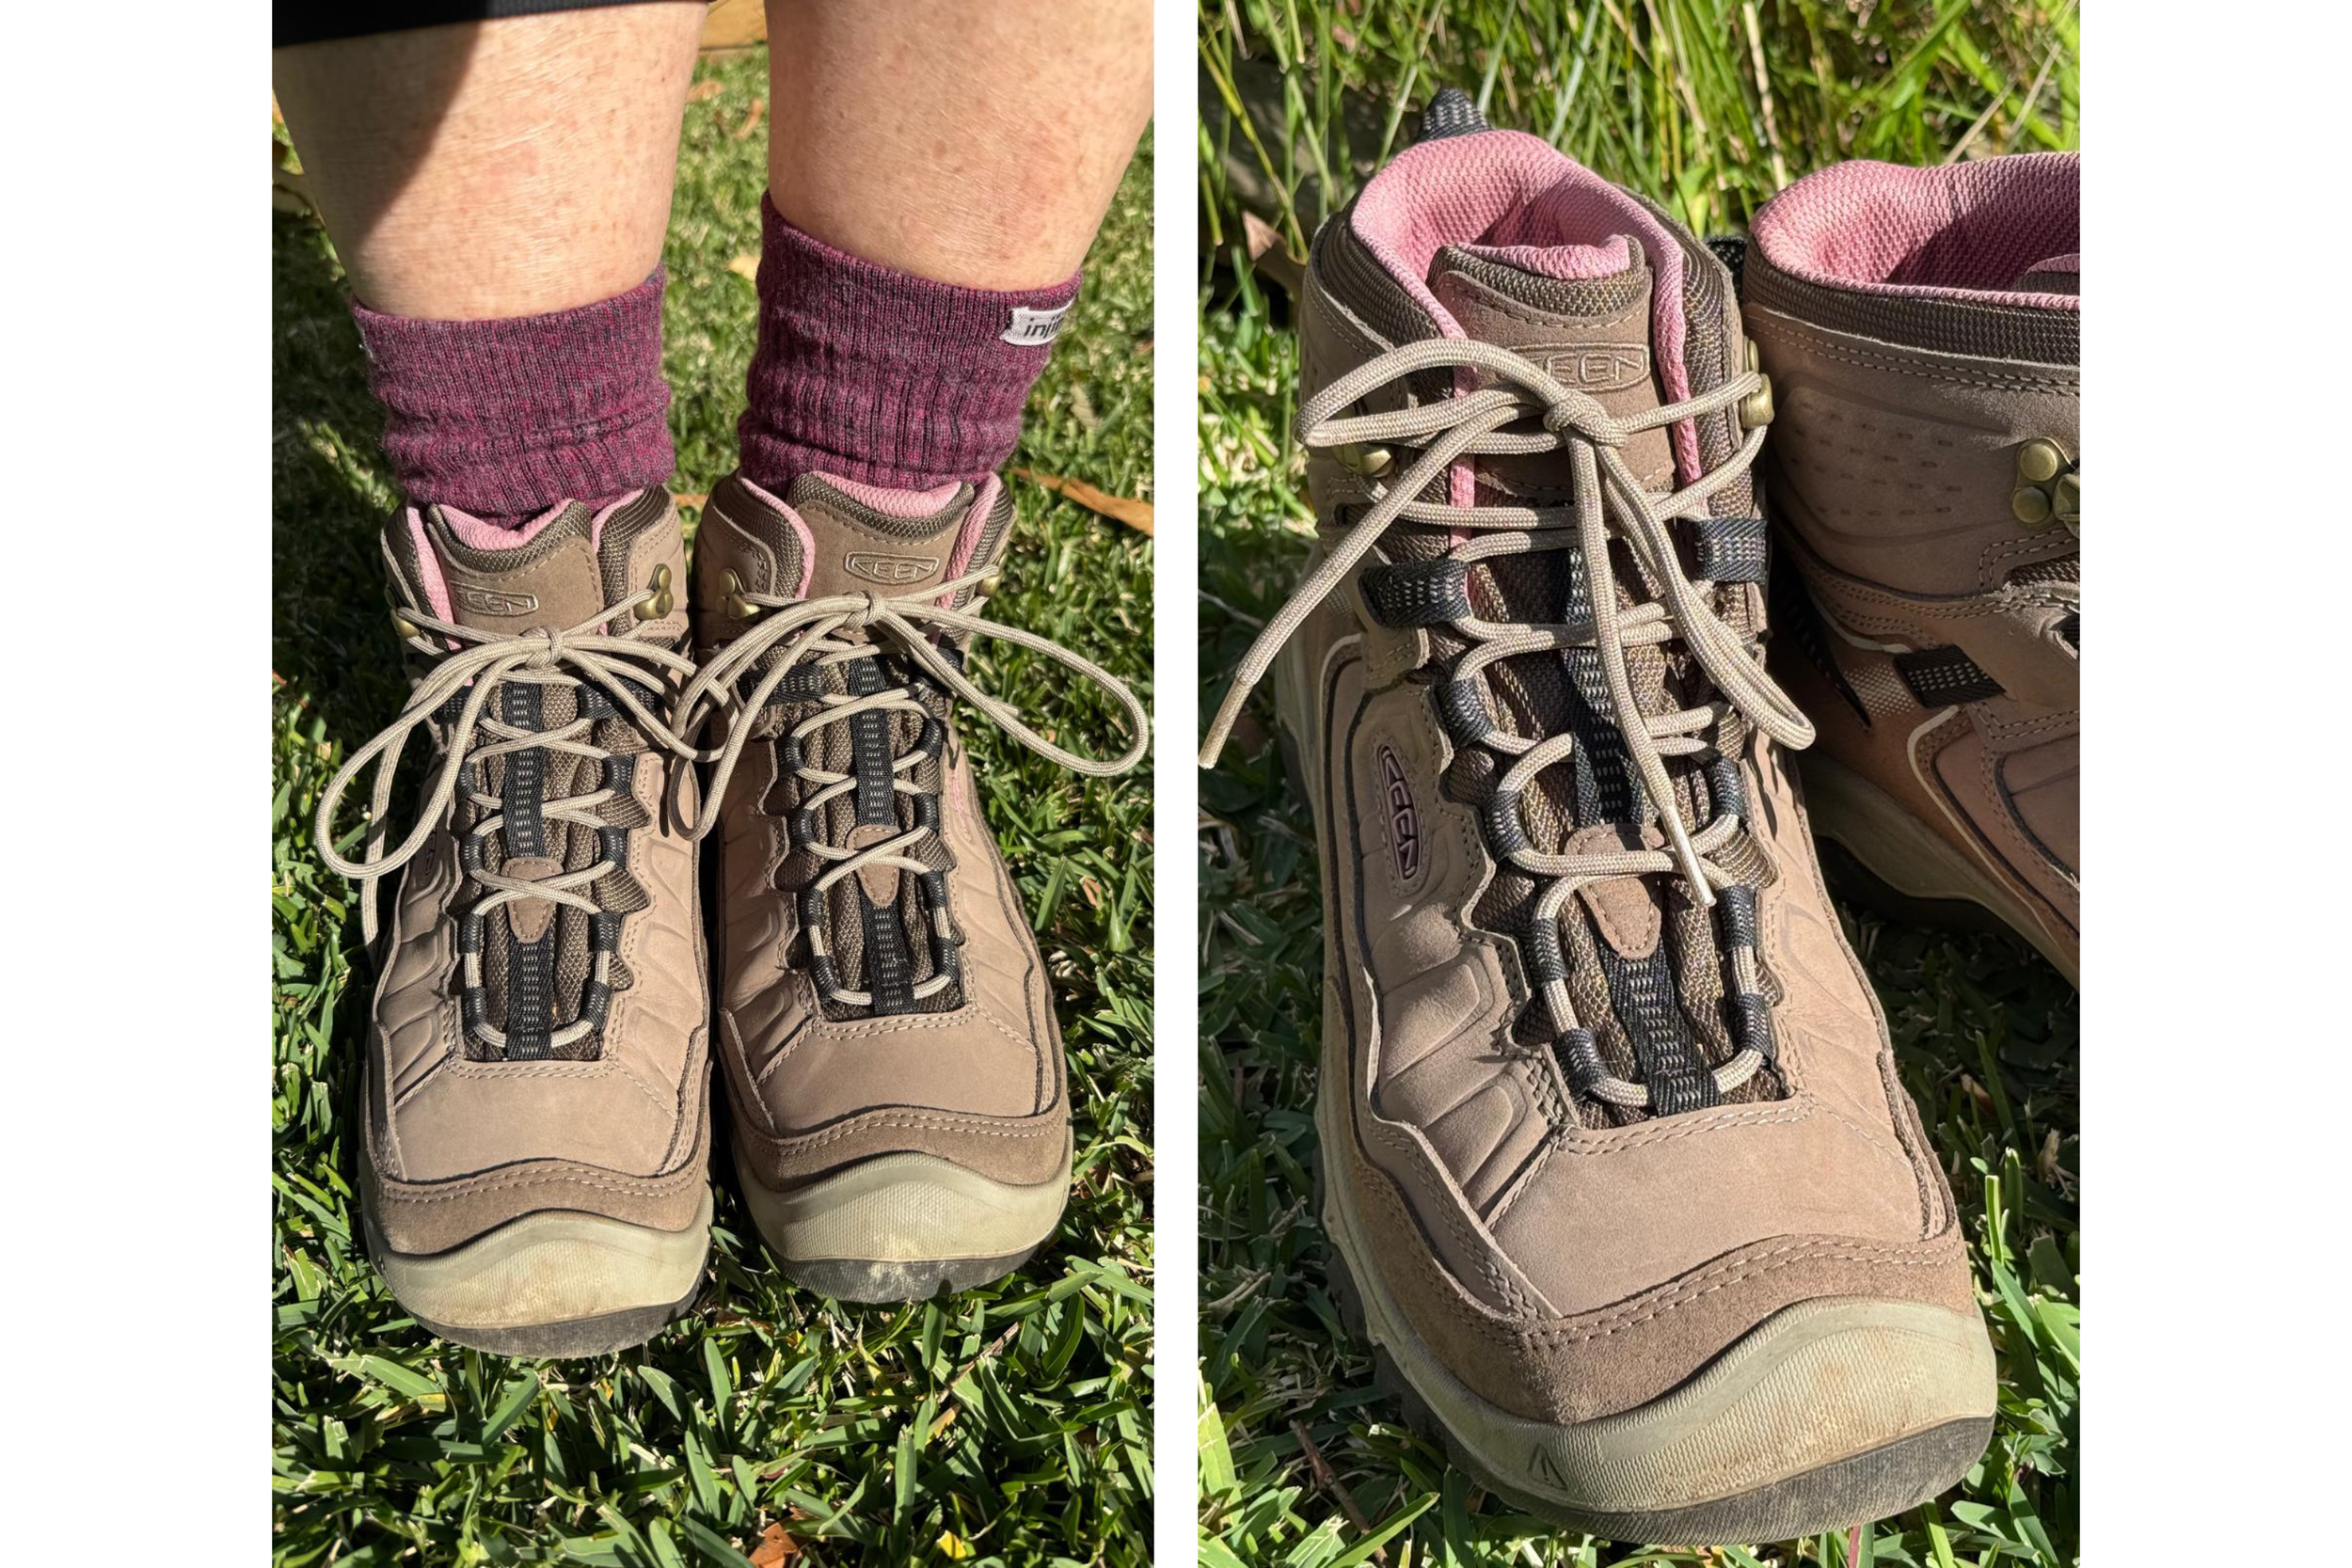
How to: Window lacing
Finding the right combination
And finally, here's something else worth remembering... you don't have to rely on one magic fix. Over the years, I've found it's the little things, working together, that make long days on the trail far more comfortable.
My own foot comfort system looks like this:
• slightly larger boots
• Heel Lock lacing
• quality hiking socks
• good toenail maintenance
One of the things I love most about our Diamond community is that we don't just train for adventures, we share the little lessons that make those adventures more enjoyable.
Sometimes the smallest changes make the biggest difference. And if I can help save just one pair of toenails along the way... I'll call that a successful hike.
See you on the trails.
💎 Adventure Guide Suz